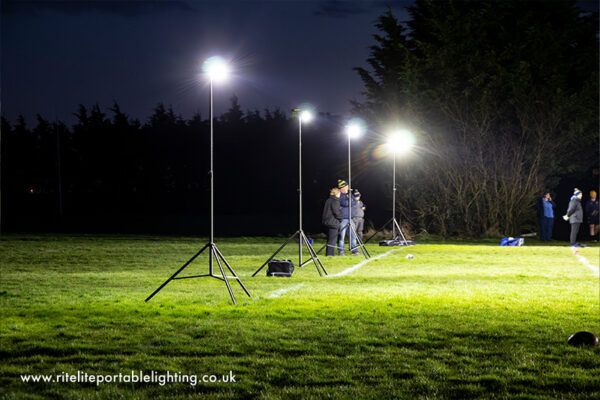
To support our winter training sessions at Greentrees Park (8 Acres), Robert Emmets CLG have invested in
8 Ritelite Sports-Lite LED floodlights. These provide powerful, portable lighting to extend evening training sessions safely.
This page provides simple instructions and key safety points for setting up, operating, and charging the floodlights.
Please watch the official setup video before using the lights.
🎥 Watch Setup Video (Ritelite Sports-Lite)
📄 Download Full Operator’s Manual (PDF)
⚙️ 1. Before You Start
- Only trained users should operate the floodlights. Training/demo will be given to all coaches and support will be provided.
- Inspect the area — it must be flat, firm, and level (no slopes or soft ground).
- Do not use in wind speeds above 25 mph.
- Keep clear of overhead wires, uneven terrain, or walkways.
- Check batteries are fully charged before heading to the pitch.
💡 2. Setting Up the Light
- Choose a suitable position for best light spread.
- Unpack the tripod and loosen the leg knob (turn anti-clockwise).
- Pull legs outward until the support bars are level with the ground.
- Tighten the leg knob (clockwise).
- Insert the battery pack into its bracket and secure with the Velcro strap. Always lift using the handle, never by the cable.
- Attach the light head to the mast and tighten the locking knob.
- Connect the battery cable to the light head until it clicks.
- Press the power button on the rear of the light head to turn it on.
- Raise the mast by pulling the upper section up in stages until fully extended.
- Tighten the mast knob to lock in position.
✅ The light is now ready for use.
🔄 3. After Training — Powering Down & Disconnecting
- Lower the mast slowly by pressing the release lever — it will descend under control.
- Turn off the light using the power button on the back of the head.
- Disconnect the battery cable by pressing the tab and gently pulling apart.
- Allow the light head to cool for at least 5 minutes before packing.
- Remove the battery pack carefully using the handle — do not lift by the cable.
- Store the battery separately from the light head when transporting or charging.
- Pack away the tripod and light head into their bags or transport wheelie bin.
🔋 4. Charging the Batteries (Changing Rooms)
- All charging must take place indoors in a dry area, we will have an area in the changing rooms setup for charging.
- Use the set of single charger provided in the changing rooms.
- Connect the charger plug to the battery first, then plug the charger into the wall socket.
- The charger light will glow red while charging and turn green when fully charged.
- Charging from empty takes around 6 hours.
- When finished, switch off the mains first, then unplug the battery.
- Batteries can be left connected overnight — the charger manages power automatically.
- Ensure all batteries are on charge after training so they’re ready for the next night’s session.
- Before each session, check that each battery shows full charge (one red and four green lights on the display).
🧰 5. Maintenance & Safety Reminders
- Inspect each light before use for damage, loose parts, or frayed cables.
- Do not use damaged tripods, heads, or batteries.
- Keep all connectors and moving parts clean and dry.
- Report any issues to the Club Coaching Officer and/or Club Secretary.
- For repairs or replacement parts, see the Spare Parts Manual and raise a request with the Club Secretary.
⚠️ Key Safety Tips
- Never move a light while the mast is raised.
- Keep people clear when raising or lowering the mast.
- Avoid dazzling nearby residents, traffic, or other teams.
- Do not use on ice, snow, or soft ground.